Simply Sweet Home

Recipes, Decor, Crafts, Product Reviews, Giveaways and more.

Sunday, November 6, 2011

Ice Cream Happy Hour Review, Giveaway, and a Recipe


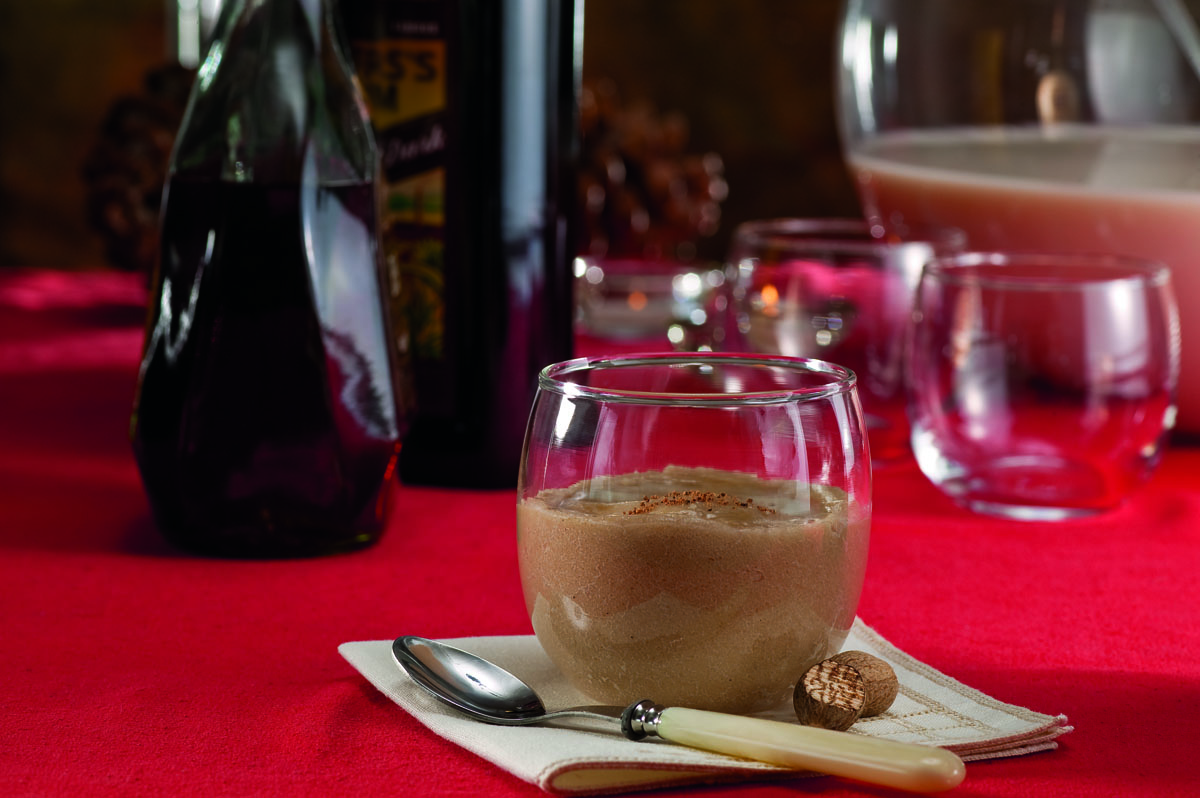
Eggnog with Brandy and Rum

The holiday entertainment season is upon us, which means lots of excuses for drinking and desserts. What better way to impress your guests at the end of a dinner party or holiday festivity than with boozy ice cream.

Read more »

Labels: , , , , ,

Monday, June 27, 2011

Cool 4th of July Desserts

I always enjoy checking out new food ideas for 4th of July. They are so festive, fun, and patriotic! A few weeks ago I shared some Patriotic Desserts in honor of Memorial Day.  And this week I've gathered together some fun and cool treats that you can prepare for 4th of July. Hope you enjoy!

Red, White, & Blue Ice Pops from My Recipes

Ice Cream Sandwich Pops from Living Locurto

Ice Cream Cone Cupcakes from Love From The Oven

Red, White, & Blue Ice Cream The Idea Room

Red, White, & Blue Parfaits from Martha Stewart

Linking up at these parties.

Photobucket

Labels: , , ,

Wednesday, June 22, 2011

Country Style, Shabby Chic 4th of July Wreath

My mom gave me this wreath. Isn't it cute?  I have this on my door right now for 4th of July, but I really love decor like this year round because I adore the country style!

To make this wreath, you start with a vine wreath.  Next a string of garland featuring small metal stars was added.  Also strung on this garland are some small bells, which are painted red or blue.  I've seen similar garlands sold at decor retailers (perhaps Pottery Barn or Current), so I'm sure you could find something similar with a simple internet search.  Or you could go the less expensive route and buy some wire/foil type garland from Wal-mart or the dollar store.

Next wooden hearts and stars were painted and added to the wreath using hot glue.  The ribbon at the bottom can be tied and then added also using hot glue, or you can loop the ribbon through the vine and then tie it in lieu of glue.

Finally the star and welcome sign are suspended down the middle using a simple wire wrapping technique.  And another wire is wrapped around the top for easy hanging.


I'm linking up at these parties.

Photobucket

Labels: , , , ,

Wednesday, June 15, 2011

Easy Flag Wreath and Wall Art Tutorial


I love 4th of July! I don't usually do any decorating for it, but I had this flag handkerchief with a couple of paint spots on it, and because I hate to throw things away, I decided to upcycle it into a nice wall hanging.

This is such an easy and affordable project, I just had to share it with you!

What You Need:

embroidery hoop (mine was 12 inches)
flag (mine was about 15 inches wide)
scissors
hot glue gun
ribbon


First you need to position the flag inside the embroidery.  Make sure that the area inside the hoop is the exact area you want display, and then tight the hoop.  (For mine, I did the "up and down" hanging flag as seen in the Olympics, but as you can see in the picture below, it looks great horizontal as well.)


Next take your scissors and cut out the excess fabric, leaving about 1/2 an inch to an inch all the way around.  Your cut doesn't have to be perfect because you won't see any of the excess after you're done.


After you're done cutting, take your glue gun and glue your excess fabric to the inside of your embroidery hoop.  Finally take a piece of ribbon (about 8 inches long).  Loop the ribbon through the hoop.  Tie the ribbon in a knot.  Hang on your wall or door and enjoy!


I'm linking up at these linky parties.

Photobucket

Labels: , , , ,

Tuesday, May 24, 2011

Patriotic Dessert Ideas

Since Memorial Day is coming up next week (and 4th of July is just around the corner), I thought it would be fun to share some patriotic dessert ideas for this week's food post.  I found some many cute ideas as I looked on my Google Reader and on Pinterest.  Here's some of my favorites! Hope you enjoy!

Red, White, and Blue Cookie Bark from Your Home Based Mom

Patriotic Cupcake Kebobs from Zen Cupcake

Patriotic Fruit Tarts from Nothing But Country

Red, White, & Blue Chocolate Dipped Strawberries from Baking Bites

Flag Cake from Make It. Love It.


I'm linking up to these parties.


Photobucket

Labels: , , , ,

Monday, April 18, 2011

Homemade Peanut Butter Cups

I'm really excited to bring you this week's recipe!  It is a homemade version of one of my all time favorite candies---the peanut butter cup!

I first saw this recipe in Taste of Home magazine a few years ago, and I marked the page but never got around to trying the recipe. (This tends to happen a lot with me.)  But a few days ago, I was wanting to make some kind of new spring/Easter treat, so I started looking through my old magazines, and found these again.  I had all the ingredients I needed, and they were pretty easy to make, so I decided to give it a whirl!

I have to warn, these things are very tasty!  They remind me of the gourmet peanut butter cups that you order, except they're much cheaper, and the peanut butter is more sweet, almost like a Reese Cup!  And since these are so easy to make, I'd say if you make them once, you'll probably be tempted to make them again and again.  So don't say I didn't warn you!  Hope you enjoy!


Recipe for Homemade Peanut Butter Cups:

Ingredients:
1 cup creamy peanut butter, divided

4-1/2 teaspoons butter, softened
1/2 cup confectioners' sugar
1/2 teaspoon salt
2 cups (12 ounces) semisweet chocolate chips
4 milk chocolate candy bars (1.55 ounces each), coarsely chopped
Colored sprinkles, optional

Directions:  In a small bowl, combine 1/2 cup peanut butter, butter, confectioners' sugar and salt until smooth; set aside.

In a microwave, melt the chocolate chips, candy bars and remaining peanut butter; stir until smooth.

Drop teaspoonfuls of chocolate mixture into paper-lined miniature muffin cups. (I didn't have any miniatures, so I used the regular sized cups and started with about a tablespoon of chocolate in each cup, but I recommend making miniatures, because these things are rich!)

Top each with about a teaspoonful of peanut butter mixture. (For the regular sized cups, I actually used a cookie scoop to measure, so it was just under a tablespoon of peanut butter.  Then I rolled it into a ball See pic below.)

Then top with another teaspoonful of chocolate mixture. (tablespoon for regular size cups)

For fun and extra added cuteness, decorate with sprinkles! Refrigerate until set. Store in an airtight container.

This makes 3 dozen minature cups, and anywhere from 12 to 18 regular sized cups, depending on how you distribute the ingredients and how big you make the cups.


This post is sponsored by Petite Rouge. Are you looking for the perfect finishing touch? Petite Rouge has it. Simple, elegant blossoms to brighten up any outfit. Dainty enough for your smallest princess. Sophisticated enough for your growing girls. Clip on a headband or wear alone. 


I'm linking up at these weekly linky parties.

Photobucket
If you'd like to sponsor some posts on Simply Sweet Home, please email me for details.

Labels: , , , ,

Wednesday, March 30, 2011

I Love Easter Wreaths

Photo Credit: UpTown Originals


Here lately I've been all about wreaths!  Last month I created an etsy treasury of St. Patty's Day Wreaths as well as a Celebrate St. Patty's Day treasury, and so this month I followed these up with a treasuy of Easter Wreaths and another called Celebrate Easter.

Also, this month (actually last week) I joined Pinterest. It's a new bookmarking and social network site.   I've pinned some lovely things for Easter on there as well.  So today I'll be sharing some wreaths from my Etsy Treasury and my Pinterest Page. (By the way, if you're already a Pinterest member or you're going to sign up, please visit my page and follow me, and I will follow you back!)

I hope you enjoy these finds!


Springtime Easter Egg Wreath from A Work of Heart


Easter Wreath from CraftyArtist

Bright and Colorful Easter Egg Wreath from Always Present

Feather Easter Egg Wreath from Every Crafty Endeavor

Spring/Easter Wreath from Loving Every Second


Easter Egg Wreath from Crocheted Creations

Easter Wreath Topiary from Cozy Home Scenes


For more Easter Wreaths, please check out my treasury.

Photobucket

Labels: , , , ,

Monday, March 7, 2011

Chocolate Mint Parfaits


I love taking recipes that work and giving them a slight twist! Last week I shared my Frozen Mint Cups with you.  And this week I'm taking the same recipe but adding a little brownie to it.  The result is a yummy parfait, suitable for at home snacking or entertaining.  Just imagine serving these up alongside the Frozen Mint Cups for St. Patrick's Day! So fun and festive! Hope you enjoy!


Recipe for Frozen Mint Cups:

Ingredients:
1 8oz whipped topping
2 teaspoons mint extract
a few drops food coloring
chocolate mint cookies
1 batch of brownies or a chocolate cake

Directions: Add mint extract to whipped topping. Mix well to distribute the flavor. Add a few drops of food coloring and stir in. Add more if you like, to get your desired hue.

Place chocolate mint cookies  (about 3 per parfait) in a ziplok bag and crush with a rolling pin or other kitchen utensil. Or use the food processor. Crumble your brownie into a bowl.  Then layer your ingredients into bowls or cups. Top with a cookie crumbs and an additional cookie.


I'm linking up at these parties.

Photobucket

Labels: ,

Wednesday, March 2, 2011

St. Patrick's Day Wreath

I had planned for the first Wednesday of each month to be for my jewelry showcase, but I'm doing some rearranging this month because  I wanted to make sure that I shared this wreath in time for others to  be able to make their own for the holiday.  This is a very easy wreath to make.  No crafting tools or skills needed!


What you need:
plain wreath
clover garland (found at Wal-mart or Hobby Lobby)
ribbon (for hanging)

Directions:  Simply take your garland and wrap it around the wreath.  This particular kind of garland has a wire at it's base, so it easily wraps around and through the vine wreath to stay in place.  But if you're using another type of garland, you may need to use some hot glue to make sure it doesn't come unwrapped.  Then simply tie a ribbon to the top for hanging. And you're done!

In honor of the St. Patrick's holiday, I've added this really cute clover cloth to the sewing machine in the dining room.  Here's Dixie posing with a few of her clover-adorned friends!


I'm linking up this week to these parties.

Photobucket

Labels: , ,

Monday, February 28, 2011

Frozen Mint Cups

I was in the mood for something minty, when I put on my thinking cap and came up with these Frozen Mint Cups.  These are really sweet and yummy without being too rich, and they are very easy to make.  So if you're kids like chocolate mint, you may want to consider making something like this for St. Patrick's Day (or just make them for yourself, either way).  Hope you enjoy!


Recipe for Frozen Mint Cups:

Ingredients:
1 8oz whipped topping
2 teaspoons mint extract
a few drops food coloring
36 chocolate mint cookies

Directions:  Add mint extract to whipped topping. Mix well to distribute the flavor.  Add a few drops of food coloring and stir in. Add more if you like, to get your desired hue.  Take about 24 chocolate mint cookies and crush them in a food processor, or place in a ziplok bag and crush with a rolling pin or other kitchen utensil. 

Line a muffin tin with cupcake wrappers. (This recipe makes about 12.)  Pour the crushed cookies into cupcake liners.  You'll want to use almost all the crushed cookies, leaving just enought to garnish the top of your mint cups.  Next spoon your whipped topping mixture evenly into each mufin cup.  Garnish with remaining crushed cookies, and then stick an uncrushed cookie in the center of each cup.  Chill in the freezer until ready to serve. 


I'm linking up at these parties.

Photobucket

Labels: , , , ,