Simply Sweet Home

Recipes, Decor, Crafts, Product Reviews, Giveaways and more.

Friday, January 13, 2012

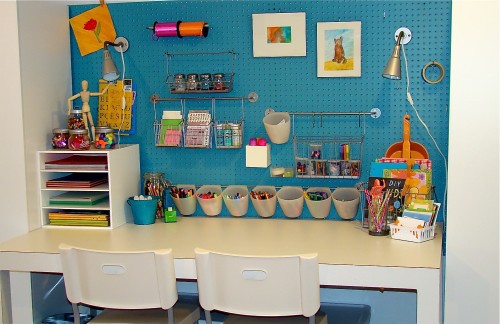
Craft Organizing Ideas


Kids Art Studio eclectic kids


Have you visited Houzz? It's a place where design experts share off their portfolios in design, decor, and remodels, and it's a great place for homeowners and design enthusiasts to go look for designers in their area or look for ideas and products for their own interior design.

If you're thinking of starting a new home decor project, or if you just like looking at other people's photos and ideas, you can sign up at the site, and add your favorite photos to your own idea book so that you can come back and look at them any time!

They have design ideas for every room in the house as well as the exterior, but I decided to check out their ideas for craft organizing!

Read more »

Labels: ,

Friday, January 6, 2012

Getting Organized: Spice Racks


Photobucket
A new year is the perfect time to get organized! At the start of the new year, I always like to reorganize my cabinets.  To get started, it helps to have organizers such as  kitchen spice racks.


Read more »

Labels:

Wednesday, January 4, 2012

Free Printable Blog Planners and 2012 Calendars

Photobucket

My most popular post in 2011 was my Free Fall Printables post. I really enjoy finding and sharing free printables and look forward to sharing more of these in 2012.  To start the year off,  today I've got a collection of printable blog planners and 2012 calendars for you!

If your New Year's resolution is to get better organized with your blogging, or just to get organized in general, you'll love these freebies!

Read more »

Labels: , ,

Thursday, December 22, 2011

Fun Holiday Ideas with Pringles

Photobucket

I always love thinking of new ways to use and reuse things, especially containers!  Instead of throwing away  that Pringles can after the chips are gone, consider reusing it!  There's so many possibilities for those little cylinders!

Read more »

Labels: , ,

Wednesday, February 17, 2010

Does Your Kitchen Look Like a Post-It Commercial? Declutter Your Fridge and Bulletin Boards Today!

Do you guys post stuff on your fridge? Or do you have bulletin board in your kitchen for posting important items? I've always tried to keep our refrigerator neat and clutter-free, just posting something on it here and there. On the side of our fridge, I posted a few "important coupons" and some diabetes-related stuff for my husband who was just diagnosed back in November. Then all of a sudden...Boom! The refrigerator starts looking like a cluttered desk! A couple of weeks ago I was doing a general decluttering in the house, and I decided that this just wasn't working:
I removed all the papers, coupons, and some of the magnets, leaving my little Menu Planner Board, a couple of magnetic notepads, and just a couple of cute magnets behind on the fridge. Much better!
So where did all the papers go?? They were moved to a secret location known only to a select few. I'm pleased to present the inside of the cabinet doors.
I remember when I was little my mom had a list of important phone numbers posted inside of our cabinets and a calendar. It's a great place to post things where you can see them, yet still keep them hidden from the rest of the world. (And now every time hubby opens the cabinet to get out his meds, his blood sugar testing chart is right there in his face.)

And here's my favorite part! I have a coupon binder for most of my coupons, but I like to keep a few really good ones out so that I will not forget to use them. I took all the coupons off the refrigerator and placed them in this "handy dandy coupon pocket."

To make the pocket, I simply took a business envelope and folded back the flap. Then I just placed tape on the edges of the envelope (bottom & sides) and hung it up inside the cabinet. Because the envelope is extra wide you can place a bunch of coupons side by side and overlap them one behind the the other so that you can see several at one time. Here there's only 6-7 coupons, but I've since added a bunch of others to the pack. This is also a great way to keep up with appointment cards.

So there you have it! A solution for decluttering that pesky fridge or bulletin board while taking advantage of all that empty (& hidden) space within your cabinets!

-Jerri

-----------------------------
I'm posting a link to this post at:
It’s So Very Creative hosted by It’s So Very Cheri
Making the World Cuter Monday hosted by Making the World Cuter
Metamorphosis Monday hosted by Between Naps on the Porch
DIY Day at A Soft Place to Land
Tackle it Tuesday is hosted by: 5 Minutes for Mom

Labels: , ,

Wednesday, January 13, 2010

WAHW: Goal Setting and Scheduling Time in 2010

Each new year we make a list of goals or projects for the year, but by March many of these fall by the wayside (if not before then). The key to achieving your new year's resolutions and completing your projects for the year is to set attainable goals and schedule time to work on all your projects and goals.


Keys to Goal Setting:

1. Set realistic, attainable goals.

2. Set goals that can be easily measured.
-Examples:
* I will post 5 times a week on my blog.
* I will get 50 new followers this month.
*I will get 5 sales a week.
* I will meal plan each week.
*I will try a new recipe each week.

3. Give yourself a time frame or deadline to achieve your goals.
-Examples:
*By the end of the month I will have my first sale.
*By the end of the month I'll have 10 new craft projects completed.
*I will declutter one closet each week.

4. Schedule time to work on your projects and goals. In other words, treat it like a job. This can be as general or specific as you'd like it to be, but you should make scheduled time for all your endeavors and be consistent.
-Examples:
*I will post on Monday, Wednesday, and Friday.
*Each morning I will spend two hours working on my blog or networking.
*Each day I will clean one room in the house.
*Each morning I will list new items in my shop.

5. Write down your schedule and/or document your work.
-Keep a planner to write down your schedule and the tasks you want to perform each day.
-In your planner, in a separate notebook, or a on a blog, make a list of what you do each day. This will help you to measure your progress and will help you to stay on task.

------------------------------------

Great Calendar For You: For those of you who have goals to declutter and keep a cleaner house this year, you may want to have a look at this year's Declutter Calendar over at My Simpler Life. The calender gives you a different task to do each day to help keep your house clean and clutter free. You could also have a look at this calendar and then make your own with your specific needs and tasks in mind.


-Jerri


Labels: , , ,

Monday, December 28, 2009

Relish! Menu Planning Review & Giveaway!


As you all know I love organizing and menu planning. Needless to say, when I got an email asking me to review the Relish! Meal Planning Website, I was really exited, and now I'm excited to be giving away a free membership in honor of my 500th post!

Meal planning can really help you to save money, and it will save you a lot of time. This website would be a great tool for everyone whether you're a beginner or an expert at menu planning, and it's very user friendly.

There are a lot of great features that I think you'll find very helpful. On your main screen, you'll find a list of meals to choose from, and each week there's a different list of recipes featured here. The page instructs you to choose 5 meals and one dessert from the menus. On this page there is also a list titled "Dime and Dash," which gives you a list of quick and inexpensive express meals to choose from.

And on this page you'll also see a section for favorites. Each week when you create a menu, you can choose to add certain meals to your favorites section, and once these are added to favorites, they will always appear on your menu planning screen. I really like this feature because it allows you to throw a couple of things that you know your family loves in with the new recipes that you select from the menu screen.

Another great feature on the main menu screen is the Recipe Legend. Beside each meal is a symbol which describes what kind of meal it is, and the legend tells you what each of the symbols mean. For example, KF means Kid Friendly. C equals Crockpot. LC means lower calorie. And M means Morning Prep.

And of course, the site is equipped with all the recipes you need. On the main menu planning screen, just click on a meal, and you'll be directed to a printer friendly page with all the recipes that you need for a particular meal. And to make this feature even better and more useful to you, there is a pull down menu where you can select how many people the meal will be for, and the recipe cards that you view will be adjusted to fit the number of people in your family. Super!


Another favorite feature of mine is the shopping list component. Once you've selected the meals you want for your menu, click "create custom menu" and the site directs you to a shopping list. In the first column is a list of "Items You Need but May Already Have." (Things like milk, butter, and spices.) And then all your other shopping list items are organized into food groups, and the shopping list even includes the quanity of ingredients you need. (So if you've selected 2 different meals that include chicken breasts, and you have 4 family members, your shopping list will have 8 chicken breasts on it.) The shopping list even goes as far as to tell you how many eggs you need, or what size package of chili powder you'll need.

Now let's say you go on the main menu screen, and none of the featured recipes sound good to you. No problem! Just visit the Menu Archive, and you'll find a ton of other options, or pull up your Past Menus. But let's say, you already have a list of favorite recipes on rotation in your house, and you want to add these recipes in with one or two of the Relish recipes each week. No problem again! If you have a favorite recipe, just submit it to Relish, and they will convert it to a meal and put it up with entrees in your favorites list.

Another part of this website that I found very interesting was the "This & That Section." This section includes a list of special menus. They feature menus for special occasions like Dinner Parties & BBQs, Superbowl, Lunches, Gourmet Potluck, Easter Brunch, Christmas, and Mother's Day. And the section also includes a list of fun menus for kids of all ages. The list included several movie themed menus including Ratatoille, Kung Fu Panda, Ice Age, and even Twilight. Sounds fun, huh? And I think this section could make your party planning a breeze.

I'm excited to be giving away a One Year Membership to Relish! to one Simply Sweet Home reader. This is a $58.80 value!

Giveaway is Now Closed.


Additional Entries:

-Bonus Entry: Tell me something you'd like to see more of on this blog in 2010 (recipes, organizing, crafts, party planning, deals, etc.)

-One entry for following me publicly on blogger.

-One entry for joining my feedblitz mailing list, or 2 entries if you are already a member prior to this giveaway.

-One entry for subscribing in a reader.

-One entry for following or subscribing to my new business blog.

-One entry for following me on twitter and/or becoming a fan on facebook.

-One entry for tweeting about this giveaway.

-Two entries for writing about this giveaway on your blog and linking back to Simply Sweet Home.

(Just leave comments for each additional entry, and please leave a user name/link or something so that I can verify. Thanks!)

Other Rules:

-Don't forget, if you don't have a blog or a profile with a visible email address, please include your email address in your comment so that I can contact you if you win. (Can't stress this enough!)


-Jerri


MckLinky Blog Hop


Click here to see the entire Giveaway Blog Hop List....

Labels: , , ,

Tuesday, September 1, 2009

Organizing Round-Up: Command Central

This month at Org Junkie the organizing round-up theme was Command Central. For this round-up I'm sharing my desk and office area. This is where I do all my blogging, home business work, and general home office tasks. These pictures aren't the greatest in the world, and I didn't take a picture of each individual item, but I did try to explain everything in detail....so you should get the general idea.

I just love my desk! In the upper left hand corner is a place to put books/papers/files. I keep all of my business files in binders, so this is a perfect place to keep the current files. On the bottom left there's a few photo albums.

On the bottom right I have drawers for some of my office supplies, and above these I have a green bin that is perfect place to keep notebooks and papers I'm using so that they don't end up all over my desk top. And on top of the desk itself I have a couple of different organizers for writing utentils and supplies (a couple of which are pictured in this post).


The bottom drawer of the desk is used to store supplies. I know it looks cluttered, but if you look closely you can see that all the items are actually organized into little slots.


And the beige-colored two-drawer organizer is used for more supplies. In one drawer I keep markers and highlighters and scissors.

And the other drawers contains post-it flags (my favorite item!), my trusty calculator, paper clips & binder clips, and markers.

And here are all my current binders:

And here a couple of office supply organizers:


And another for my planner, notepads, flags, stamps, etc:
This little drawer is handy place to keep the checkbook, stamps, business cards, etc.


And near my desk is my "file center."


I keep my "older business binders" and some other stuff in the cabinet on the lower left, and the bottom of the cabinet is actually a file drawer, which is big enough for all of important papers, paid bills, and so forth.

The organizer on top of the brown file cabinet is one of my favorite organizers. Inside the drawers, I keep extra check books, mailing labels, and envelopes. On the top left of the cabinet, I have all kinds of printer paper, and the right side is a good place to put binders, books, and papers.


The black cabinet is used to store manuals & warranty information for stuff that we buy, as well as computer software. The plastic drawers contain scrapbook paper and stickers.


And the black box on top is my temporary file box. Basically this where all my papers are stored temporarily until I get chance to file them, or pay a bill, or do whatever I need to do with the papers. This tempoary file box is a life saver when it comes to taking care of paper clutter. I did a post on it back in January. If you're interested, here's a link to that post: Secret To My Success with Filing


-Jerri


Labels:

Sunday, July 26, 2009

Tips for a Successful Yard Sale: Misc Tips


Misc. Tips

-If you have friends, family members, or neighbors that want to have a yard sale, you should consider having your sales together. This way you'll have more items at your sale, which means people will be more likely to stop, and if you're advertising in the paper, it's a plus to be able to say that you are having a "2 family (or more) yardsale."

-Or if you know that another family on your street will be having a yard sale, you could consider coordinating yours around the same time. If people are looking in the paper for yard sales to hit, they'll be more likely to go to areas where there is more than one sale going on.

-For quick pricing, buy the price stickers that are pre-made. It saves so much time.

-If you really want to get rid of stuff, plan to do price mark downs. If you're having a two day sale, do your mark downs at the end of the first day. And if you're having a one day sale, do your mark downs around lunch time.

-Be sure that you are up at least an hour before your sale will start. Even if you put a note in your ad that says, "no early birds," you are bound to have some. Many yard sale enthusiasts leave out before the sun is up to start hitting yard sales. It sounds crazy, but it's true.

Display Tips:

-If you can't get racks for clothes, you could hang clothes on your front porch or get some wire to create a temporary clothesline.

-If you don't have enough table space, try moving your items closer together and place big items somewhere else, perhaps on the ground.

-There are many things you can use to substitute for a lack of table space. If you have a pickup truck, you can put the tail gate down and place items on the bed of the truck.

-Lay out an old bed sheet on the ground, and you can put a lot of toys, books, and other items on it.

-If you're selling any tables, you could use them to display other items temporarily.

-If you have a lot of books to sell, consider bringing one of your bookshelves outside to display your books.

-Boxes and tubs that your items were once stored in, can be used to make temporary tables. Just lay few on them on their sides, and you're good to go.

Finding Things to Sell:

-The obvious source for items to sell is the attic, garage, and basement, but you should look around the entire house for items that may be unnecessary and better off in a yard sale.

-Always go through your closets. Pull out any clothes that don't fit or that haven't been worn in a long time. Do the same with shoes.

-Go through kitchen cabinets and drawers and discard any items that never get used. Don't forget to go through the "junk drawer" if you have one.

-Go through the toys in your child's room and get rid of things that never get played with. (Tell your kids who may object to this, that if you find some things to get rid of, then there will be money to buy new stuff in the future.)

-Look around your home office. Get rid of unnecessary supplies, books, magazines, etc.

-Consider de-cluttering your bathroom. If you have a lot of extra shower gels, bubble baths, and body mists that never get used, sell them.

-And of course, if you have your own etsy shop or a home based business, this is a good time to put some of the items that you sell out on display. Even though it's a yard sale, and people are expecting to pay cheap prices, if they see something they like that's brand new, they will be willing to buy it. (Don't forget to have some business cards available.)

-You should also consider selling refreshments. Take out a cooler and fill it full of ice and bottled waters. You could also sell sodas if you'd like. And if you have kids, you can let them run their own lemonade stand. You can also offer homemade snacks like cookies, brownies, or cake slices.

-Jerri


Labels: ,

Friday, July 24, 2009

Tips for a Successful Yard Sale: Advertising and Signs

Free Picture of a Yard Sale. Click Here to Get Free Images at Clipart Guide.com


Advertising:

-Be sure to place a sign at the end of your street, and at the end of other streets in your neighborhood. Also, post some signs on main roads outside your neighborhood.

-Post flyers for your yardsale on bulletin boards in your community. Some places you can post these include civic centers, grocery stores, laundry mats, etc.

-About a week ahead of time, be sure to tell your family, friends, co-workers, neighbors, and fellow church members about your yard sale. Tell them the kinds of things you'll have and encourage them to tell people they know.

-Post about your yardsale on your blog. If you have friends and family who you may not talk to on a regular basis, but they read your blog, this will be a great way to get the word out to them. You may even have blog followers who'd be interested in purchasing items from you that don't sell at your yard sale.

-Place an adveritsement in the newspaper. Be sure that you list some specific items in the ad. Some things that will bring the people in are baby clothes and baby toys/items, children's clothes, furniture, toys, and antiques. You may also want to specifically list big items such as a couch or table and chairs, and you may want to list the clothing sizes that you'll be selling.
-Depending on what you're selling, you may want to contact local shop owners or flea market booth owners. My parents used to sell a lot of antiques, and they'd have a lot of antique dealers and flea market dealers come and buy a lot of stuff.

Advertising Sign Tips:

-If you are having a 2-Day yardsale, you should make 2 different signs, one that says, "Friday & Saturday," and another that just says "Saturday." At the end of the day on Friday, you can take down your Friday & Saturday sign, and replace it with your "Saturday Only" sign. "Why?" You ask. If someone drives by on Saturday morning and sees your yardsale sign, they will be more likely to stop if your sign says "Saturday Only." If they see that the sign says, "Friday & Saturday," they may assume that all your best stuff was already sold on Friday and they'll go on to another sale.

-Be sure that your sign is sturdy enough to withstand winds without bending or blowing away. Cardboard is a good material to use or you could something sturdy from the craft store. Also, be sure that your writing is large and dark enough to see.

-Do not let kids help make the sign.

-Keep your sign simple and neat, and be sure that the writing is legible. Also, have one person make your signs to be sure that handwriting on the signs is the same. This way when people see all the signs you have out, there will be no doubt that they are advertising the same sale.


-After your sale is over, be sure to go back and get your signs. Many places have laws requiring you to take them up after a certain amount of time. Also, if you have a good sign and are planning to keep it, you'll want to get it before someone steals it. (Yes, it's hard to believe, but if it is a good sign, there is a chance that someone will take it.)

Coming Up: Display Tips, Things To Sale, and Misc Tips

-Jerri


Labels: ,

Wednesday, June 10, 2009

Bridal Shower Links and Resources


Today I have a great list of resources to help you plan the perfect shower or wedding. A lot of planning goes in to even the smallest and simplest party, but these sites should give you all the ideas, information, and supplies you'll need, or at least give you a good start.

Simply Wedding Stuff - Great check list for organizing and planning your wedding shower, along with a lot of great items and info.
BridalShower.com - Shower games, party favors, supplies, and themes.
Celebrations.com - Lots of decor ideas for weddings and other occasions
4Showers.com - Decorations, favors, and paper goods
SimplyWeddingStuff.com - shower decorations, favors, and supplies
Bridal Shower Ideas for You - A list of ideas on everything from decorations and centerpieces to a the party favors, the cake, and a checklist.
Bridal Shower Themes from Frame Your Day - A list of shower themes and ideas for each theme.
Party Supplies World - More supplies for your wedding shower.
Abee Bridal Showers- Free Games - This site has a lot of info on wedding stuff. This particular link has 4 lists of free bridal shower games and descriptions of the games.
Wedding Favors to Go - Favors for all themes and seasons.
To Love and To Cherish - Blog about weddings and showers. They also sell invitations for all occasions.
Bachelorette Superstore - Party favors, supplies, and everything else you need for a shower or bachelorette party.

-Jerri


Labels: , ,

Saturday, May 30, 2009

Organizing Round-Up: Surfaces & Shelves


Organizing Blog


Here is my entry for this month's Organizing Round-Up. This month's project was shelves and surfaces. I had orginally planned to organize all my bookshelves, but I just couldn't quite get around to it. So I did a few mini-projects instead. Actually mine involved in little more de-cluttering & tidying up than organizing, but I guess it all counts. Sorry I didn't get the before pictures of everything, but I'm sure you'll get the idea.

I did a big clean up of our small bathroom last weekend. This is the over-the-toilet organizer we have. Originally the wash rags were stacked inside the cabinet, and the top shelf was lined with a bunch of stuff like contact solution, dental floss, make-up, and hubby's shaving stuff. It was a mess! I removed all the items and placed them in the cabinet or in the basket on the bottom shelf. Now it looks a lot neater, and we don't have to worry about stuff falling into the toilet.

I like placing small items in a container of some sort. It makes things look a lot neater. I bought a set of 3 little red baskets at the Dollar Tree and was able to put them to good use on my surfaces. The first basket is in our big bathroom near the sink. I have a set of drawers that I was placing my jewelry on, but it was too easy to knock it off in the floor, and after a while I tend to get a few items there, so it looks messy. So my solution was to place this basket here. It will save the jewelry from falling in the floor; plus it helps it too look as though it belongs there. And after a while, I can just pick up the whole basket and put everything away.


The second basket was placed on my dresser. Our house doesn't have a lot of storage space, so I decided to place my perfume bottles on the dresser. (It's also a good to have them there, because I'll see them there and actually remember to put on the perfume.) But I hate having a bunch bottles laying around. Somehow containing them in the little red basket, helps my brain to tolerate them and it makes the space look a little neater.


The third red basket is being used at my kitchen sink. And as you can see, I'm using it to hold my sponge, scrubber, and drain-stopper. This small thing is a huge improvement not only because it contains the stuff and makes it look less cluttered, but because it helps to keep the actual counter top and sink clean, because any excess water and soap is on the bottom of the basket rather than making spots and rings on the sink and counter.


I also organized these lotions and body sprays that were on my dresser into a basket. Here's a before picture:

And here's an after pic:


And finally the thing that actually took a bit of time: The Clothes Dryer. I've been using the dryer to lay out my beads and jewelry tools and projects. I lay them out here because it's the only place where I can guarantee my cats won't get to them.

And I try to clean up after I get done working, but sometimes I quit abruptly or right in the middle of a project, and stuff tends to get left out, as you can see here:

I worked for quite a while to get all my stuff re-organized. My beads are in little plastic organizers that I've placed in a drawer, and all my finished products are stored there as well. And all my charms/findings/tools/etc. have been re-organized in this little caboodle from yester-year.
Now that's definitely a lot neater! My goal is to keep it this way!


Stop by Org Junkie to see all the other organizing projects at the round-up.


-Jerri


Labels:

Wednesday, May 27, 2009

Organizing & Cleaning Tips for Surfaces & Shelves

The key to keeping shelves and surfaces clean is to simplify, that is, keep only a very few important items out on your surfaces. Then clean your surfaces thoroughly and place your items in a location that is logical but also makes the space more aesthetically pleasing and inviting. And if possible keep loose items in jars, baskets, or other containers so that they are accessible but hidden. Here are a few other tips that might be helpful to you.

Kitchen & Bathroom Surfaces:
-Keep counters as clear as possible, keeping out only items that you use every day, such as a coffee maker or can opener.
-Do daily maintenance on counters and surfaces, removing "stray" items that don't belong and wiping down surfaces.
-If you're low on cabinet space, a bread box is great place to store snacks or even extra appliances that you'd like to have handy but keep hidden.
-Use baskets or containers to store items more neatly on surfaces. Jars and decorative glass bowls are also great for storing items on top of surfaces, while still maintaining a neat looking surface.
-For quick bathroom organization, mini plastic drawers are great for make-up, jewelry, and hair accessories, as well as creams and ointments. And they fit nicely on counters and on over-the-toilet organizer shelves.
-To maintain a neat bathroom, do daily maintenance, wiping down the counter and sink each morning after getting ready or before going to bed. And keep very few items out on the sink or vanity.

Kids Stuff, Crafts, & Office
-A bookshelf is a great place not only to organize books but also arts & craft supplies. Place small pieces in small plastic containers or drawers. Then place these on your shelf. The same concept can be used with a simple wall shelf. Place containers on the shelf and hang the shelf over your desk or crafting area for easy access to supplies.
-The above idea is also great for kids stuff. Legos, blocks, doll accessories, and other small pieces can easily be stored away in small containers and then placed on a shelf.
-To keep your desk or crafting area clean, do daily maintenance. Clean up after each daily session. And place all items from a current craft project you're still working on in a container or on a tray for easy removal/clean up.
-To maintain a clean office and desk, it's best to keep only a few important items and supplies out. Anything that you do not use on a daily basis should be stored away in a drawer or container.
-Organizers are very helpful in maintaining a clean desk. I have a pen and pencil holder that has 4 extra compartments for paper clips, rubberbands and small items. I also have a desk lamp that has compartments in its base for pens, post-it notes, and other supplies. And I have an office organizer that holds note pads/papers/envelopes/supplies.
-It's also helpful to have paper trays or an organizer to hold file folders and other documents you're working on. Having a place to store these is crucial to keeping a paper-clutter-free desk.


-Jerri


Labels: ,

Friday, May 1, 2009

Kitchen Cabinet Solutions

I love organizing products. Whenever we go to Wal-Mart or Target, my husband does his best to keep me away from the organizing section! Below are some great organizing tools that you may like for your kitchen cabinets.


UNDER SHELF WRAP RACK - I actually keep my wraps and baggies in a drawer, but I used to keep them in a cabinet and probably still would if I had one of these. It makes it easy to grab what you need and keep all the stuff contained in an area without having to worry about stuff falling out.


Copco 2555-9424 2-Tier 12-Inch Non-Skid Cabinet Turntable - I have one of these for my spacies. I use the bottom shelf for cooking spices and the top shelf for baking spices. It makes everything easy to find and access.


Tagco Spice Stack - White - If I didn't have a turn table like the one above, I'd probably store my spices is a rack like this. It's very compact and makes everything look neat and orderly.


Double Chrome Helper Shelf - I've been thinking of purchasing one of these. I can think of a lot ways that I could possibly use this. This is a great tool that helps you to take advantage of all the vertical space in your cabinets. And you can use them for food, dishes, or even for bathroom storage.


Cabinet Door Lid Rack - One cabinet that I want to work on in the future is the one where I keep pots and pans. And I love the idea of a rack to keep all the lids together. This particular one mounts one the door of your cabinet, but they make other kinds as well.


Door mount 8 Shelf Pantry Rack - I had one of these in our old apartment. The amount of cabinet space in the kitchen was terrible. So I had one of these on the door, on the inside of the laundry room. It was perfect for cereal, pasta, and other boxed items. And if you're lacking in space, you may want to try this.


Chrome Pantry Can Goods Rack - This is another item I'd kind of like to try. We have a pretty good amount of cabinet space, but I probably don't store as much as I could because I'm more concerned with it being organized. (All the green beans are in a row. All the corns are in a row. And I do stack everything, so even though it's organized, it still looks crammed.) This could be a helpful tool make everything look a little more orderly.


-Jerri


Labels: